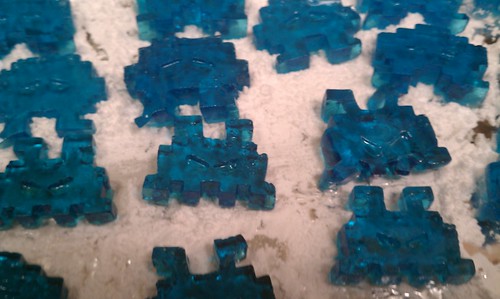
Hard Candy Recipe

Ingredients:
[ul][li]2/3 cup corn syrup[/li]
[li]2 cups granulated sugar[/li]
[li]3/4 cup water[/li]
[li]food coloring (liquid or gel works best)[/li]
[li]candy flavoring oils (I used LorAnn, extracts won’t work)[/li]
[li]Sour Salt / Citric acid - this is optional but it makes the candy incredibly tasty and adds a zing to the flavor, you can often find this in canning supplies.[/li][/ul]
Tools:
[ul][li]Candy Thermometer - Like this one[/li]
[li]Metal chop stick or a metal stirrer (weird I know)[/li]
[li]4 Cup Pyrex Measuring Cup - measuring cup MUST be able to withstand 300F+[/li]
[li]Small pot holder[/li]
[li]Pot that can hold 4+ cups, I recommend stainless steel[/li]
[li]Tin foil[/li]
[li]Candy Molds - very important, ensure these are molds for hard candy, not chocolate. Chocolate molds will MELT. Silicon molds are also fine, just ensure they are food safe and good up to 450F[/li]
[li]Pam or similar cooking spray. Not bakers joy.[/li]
[li]Confectioners Sugar[/li]
[li]Gallon size ziplock bags[/li][/ul]
Instructions:
First cover your working area with tinfoil. Including a spot next to the pot to lay tools on, and under your molds. Its much easier to clean up and the candy won’t stick as readily to foil. After this you’ll want to place your pyrex cup on the foil next to the pot.
Second lay out your molds. I recommend its a space close to the stove and at a comfortable height. Once the molds are laid out lightly spray them with cooking spray and then blot off the excess with a paper towel. If you don’t the candy will stick and be a pain in the tuckus to remove. As a note you only need to do this for the first batch if you are making multiple batches and will need to anytime you wash the mold with soap.
Now you’re ready to start making the candy.
[ul][li]Mix in a pot the sugar, corn syrup and water. Make sure its stirred well! Turn on the heat and continue to stir the mixture until it has a less grainy feel.[/li]
[li]Clip your candy thermometer to the pot, make sure the bulb isn’t touching the bottom of the pot but is completely submerged. You want the tip to be near the center of the pot not on the side.[/li]
[li]It should reach 220F fairly quickly, the steam at this point will start to dissipate. Continue to watch the temperature.[/li]
[li]At 300F turn off the heat and move the pot to another burner do not let it go higher then 310F. Wait for the temperature to drop down to 290F before proceeding.[/li]
[li]Remove the thermometer and set it on the foil. Add a few drops of your coloring and mix it in the pot and then quickly and safely pour the contents of the pot into your pyrex measuring cup. [/li]
[li]Now add the flavoring (.5-1ml I use an eyedropper) and 1-2 tsps of sour salt. Use the metal chop stick or stirrer to mix the goo.[/li]
[li]Grab the measuring cup by the handle and use the pot holder to support the bottom and carefully begin to pour into your molds. DO NOT OVERFILL THEM! Pour slowly but steadily. You have about 5-10 minutes to complete your pouring before it starts to solidify. This really just takes practice but you’ll get it![/li]
[li]Once you’ve finished pouring put your measuring cup in the sink and fill it with hot water, do the same for the pot and place your tools inside the pot that got the sugar mixture on them. It takes about an hour for the water to dissolve the candy.[/li]
[li]Take out a gallon sized zip lock bag and fill it with 1/4 - 1/2 cup of confectioners sugar.[/li]
[li]The candy will take time to cool, and it’ll depend on the type of mold you used. Hard plastic candy molds will cool faster, 10-20 minutes. Silicon molds take longer, 20-30 minutes. However once it has cooled and hardened carefully pop the candy out of the molds onto the foil. Move them from the foil to the gallon sized zip lock bag[/li]
[li]The confectioners sugar will keep them from sticking together, ensure you shake the bag to completely cover them. For storage I recommend keeping them in the freezer.[/li][/ul]
Congrats you’ve just made tasty hard candy.
Edits - Step 4 adjustments for temperature and wait period before adding the coloring. Keeps the color more true.

